PROJECT 2-
what a relief!
For this assignment, we were given the choice to choose our relief models to be in a perspective, sectional, or a tunnel book view.
As for mine, I chose mine to be sectional perspective, showing the seating area of my cafe. This project was not difficult, but it wasn't easy either for me. I had to really understand and apply depth and spatial in this model for it to look realistic.

I had to hand-drawn my view because I wanted to emphasize on the railings and stairs. I tried to find another alternative by using CAD or Sketch Up, but none of them were really much help for me. So I had to draw 3 of these drawings because each layer had a bit of change.


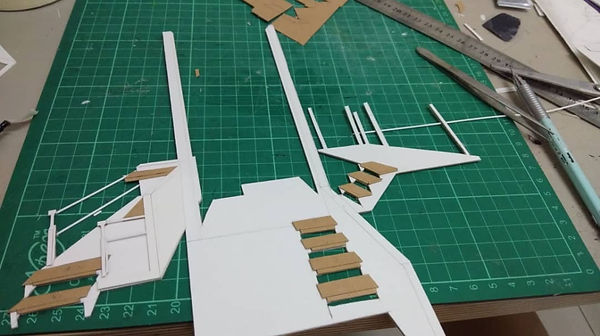
The first step was to separate the drawings into 4 layers and cut the outline on a thick modeling board. The details of the stairs, railings, and furnitures were cut and pasted on a thinner modeling board. Then, depending on which layers comes first, I added foam boards on each layer to give it depth.

This was the first outcome. To be completely honest, I was not happy with this at all. I spent too much time figuring out how to do it, redrawing the drawings over again, and cutting the details for the railings until I had limited time to finish the model itself, that it looked like a last-minute model to me. The craftsmanship of this model didn't meet my expectation either. At the time I felt so down with this.. but again, we were given time to redo our models and I couldn't be any happier.
FINAL MODEL
I was very happy with the outcome of the redo model. I redid all the layers and some of the details of the railings again, but this time I managed to keep track of my time. I added balsa wood to the main structures of the cafe so it looks more complete. I think ive learned my lesson very well, is to not be too scared to actually START DOING IT. :)


